
This post covers how to set up and properly configure Dynamic User Groups.
Note: Dynamic User Groups are only available on EdApp Pro plans.
Dynamic User Groups allow Admins to take a hands-off approach to the onboarding and segmentation of users. This is achieved by using set custom fields, for example, geographical region or business unit. These custom fields will match the data source that is set up in conjunction to automatically assign users to user groups.
Ways of using dynamic user groups with user setup
- When a user is bulk uploaded with a matching attribute associated with their username, they will automatically be assigned to the relevant dynamic user group
- When a user is manually created, Admins can also add the relevant attribute to the user to associate them with the correct dynamic user group
- Through mapping with Single Sign On (SSO)
Setting up custom fields
Custom fields must first be set up before the dynamic user groups themselves can be set up. Users can be segmented based on the criteria the Admin adds as custom fields. This can be anything from region, job title, territory, etc.
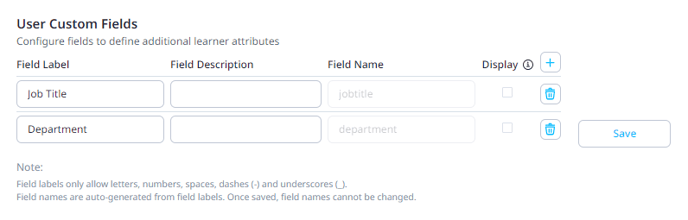
The criteria that Admins want to segment users by, must be added as a custom field within ‘App Settings’ before it can be configured on a group level. This is found under the 'More' tab and 'User custom fields'. When creating dynamic user groups, the attribute must match exactly in the custom field and the bulk upload or through SSO mapping.
- Field labels only allow letters, numbers, spaces, dashes, and underscores.
- Field labels can be edited after creation.
- Field names are auto-generated from field labels.
- Once saved, Field names cannot be changed, but Admins can always add new ones.
Setting up Dynamic User Groups
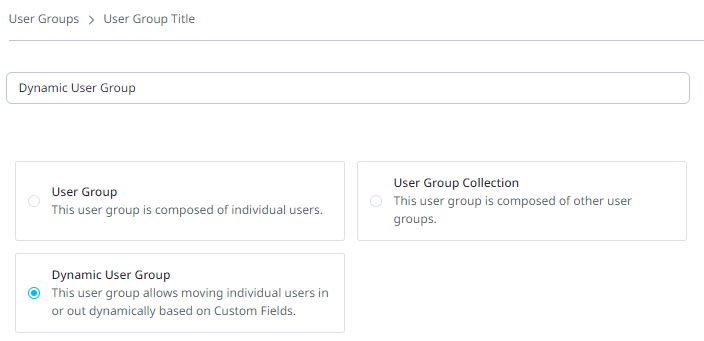
Once custom fields have been configured in ‘app settings’, setting up a dynamic user group is done via the ‘user groups’ page where Admins can create new user groups. Admins need to select the option of assigning this user group as a dynamic user group.
Custom Field Rules
Admins can set up the conditions for the dynamic user group by selecting one of the dropdown options in custom field rules. Some things to remember:
- Attributes are case-sensitive e.g. Analyst vs. analyst.
- Maximum number of conditions = total number of custom fields configured.
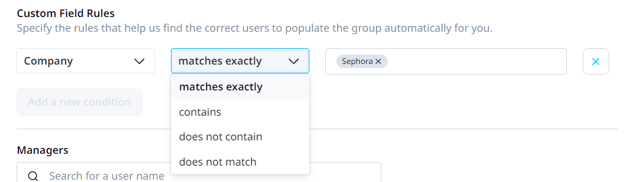
Contains: this operator is a partial match e.g. the user group would incorporate all users that have ‘Analyst’ in the custom field regardless of whether you’re an Analyst, Senior Analyst, or Graduate Analyst.
Matches exactly: this operator will pull only the exact matches e.g. Senior Analysts will fall into the group with Senior Analyst configured as an attribute.
Between the attributes work in different ways:
- conditions is “AND” e.g. the user must be an Analyst AND in Sydney in order to be in this user group.
- values in the same condition are “OR” e.g. the user must be an Analyst OR Consultant
In the example above, the following applies:
|
|
Learner with: |
|
Conditions match |
Location = ‘Sydney’ AND Position = ‘Analyst’ Location = ‘Sydney’ AND Position = ‘Consultant’ |
|
Conditions don’t match |
Location = ‘Brisbane’ AND Position = ‘Analyst’ |
Once the learner first logs in through SSO and the attributes are matched, they will automatically fall into the correct dynamic user group. If you want to change their dynamic user group, this will need to be done in your active directory system, then the change will be implemented when the user logs out and in again.
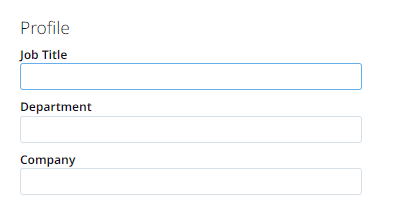
Custom fields for a user can be updated on the user’s detail page. Admins can assign a title to the custom field on this page e.g. Job Title field name can be updated for a learner to ’Systems Manager’. Remember – the attribute fields are case-sensitive.
The custom fields can also be updated via the bulk upload option on the ‘create & invite users’ page. The columns will need to follow the same layout as stated in the bulk upload instructions and then custom fields can be added on the CSV. The column header for the custom field should match the field name exactly from the ‘App Setting’ page. Once this has been uploaded, the users will be assigned as per the information in the CSV. Remember – the attribute fields are case-sensitive.

If there has been integration between EdApp and your company’s system e.g. Active Directory, OKTA, or Azure, then learners can sign in to EdApp via SSO. The learner’s attributes will be retrieved from the SSO provider and will be automatically mapped according to the set custom fields. If you are interested in setting up SSO and dynamic user groups then please talk to your Client Success Manager or email us at support@edapp.com to discuss this with a member of our Business Development team.